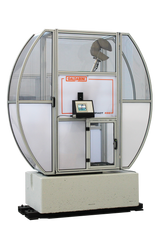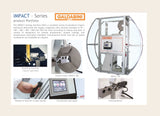


Galdabini Impact 150, 300 J
Impact pendulum testers of 150-300J are the ideal solution for testing carbon and stainless steels performing tests with breaking energy up to 300J.
An important feature is the motorised automatic lifting of the hammer after any test to optimise cycle times, which is useful for low temperature tests. In this way the operator can control all programming and testing features.
A complete range of impact machines for testing resilience covers nominal energy ranges of 150 to 300 joules, 450 joules and 600 to 750 joules for both Charpy and Izod methods. A variety of specimen preparation machines, thermostatic chambers, instrumented knifes and many useful accessories for instrument set up.
Power 220v /50 Hz or 110 /60 hz - other voltages available on request.
Pendulum loading time >9 seconds
Weight 670 Kg, Foundation 1200 Kg
International Standards
ISO 148-1: part 1 - Charpy metal Charpy notch impact testing method
ISO 14556 - Steel Charpy V shape notch pendulum impact testing instrument testing method
ASTM E23 - Metal material notch bar impact testing method
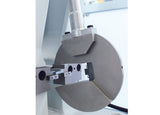
- Imapact Software Windows based software Unlimited number of tests saved Multiple batch management Report customization Statistical analysis Data transmission via RS232 Hammers ASTM E23, ISO 148-1, ASTM A370-NIST ASTM E23 and ISO 148-1 determine test methods for Charpy impact testing of notched-bar metallic specimens (“V” type of 2- 3,3 mm, “U” type of 5 mm) A typical Charpy test requires the notched metal specimen to rest on supports at each end (in a horizontal way) while coming in contact with vertical anvils adjacent to the supports. The specimen is then struck opposite the anvils at its centerline by a striker that is attached to a swinging pendulum (hammer) ISO 14556, ASTM E2298 The knife is built with an internal load cell; a complete dedicated package allows the recording of force vs time data point High speed data acquisition device with up to 2 Mhz to record the force/displacement curve during the test. Acquisition system built in the electrical panel with USB connection to the computer Centering Device Automatic sample centering system from V notch Easy specimen loading for the operator It easily allows a large number of tests Recommended for ASTM tests Pneumatic operated Air compression requested Automatic specimen centering device on specimen-end This device, according to Standard EN / ISO, comprises a retractable arm which is active on door opening and de-activated when door is closed Cooling chamber for low temperature testing up to -80°C with digital temperature indicator up to –200°C This device do not produce cold Dry ice drops Maker CO2 vessel required Required nitrogen supply system, provided by Customer Temperature compensation when specimen is taken out from costant temperature device, under cooling temperature gets broken within 3s~5s Safety Features Safety door - Operator push a button to start tests Safety bar - Operator cannot have access to a testing area when the impact machine is still working Easy Access for: Pick -up of broken specimens Striker changeover Cleaning of testing area Maintenance Stainless steel chutes This accessory offers the advantage of conveying the broken specimens on the pendulum base Motorized conveyor for broken specimens If combined with the steel chutes, this accessory allows to discharge the broken specimens outside the pendulum with great advantages for the operator Gear System Mesh gear system Hammer lifting through a zero-friction system. This safe system grants no frictions Electromagnetic gear coupling It is used by high torsion and up-arm system, non-brake pad type Broaching Press Motorised or manual notching machine A machine with a double speed control is available, as well Broach for "V" notch 2 mm depth Broach for "V" notch 3,3 mm depth (Izod type Z) Broach for "U" notch 5 mm depth Tooling for Multiple and Single "V" notches and calibration devices are available Robotic Testing Systems A typical installation is to combine 2 Impact 450 J and a Quasar of 250 kN or 600 kN Calibration Indirect Verification According ASTM E23, ISO 148-2 ASTM requires specimens testing with certified values by NIST Certified when tolerance is lower than 1.4 J or higher than 5% ISO requires specimens testing with certified values by IRM/IRMM Certified when tolerance is lower 4 J for absorbed energy lower than 40J and lower 10% for absorbed energy greater than or equal to 40 J Direct Verification It shall be performed when the machine is new or when parts are replaced, and when the results of an indirect verification are unacceptable. This verification involves: Foundation/installation Machine framework (the structure supporting the pendulum) Pendulum, including the hammer and the striker Anvil and supports Indicating equipment for the absorbed energy (scale, friction pointer, electronic device) ISO 14556, ASTM E2298 The knife is built with an internal load cell; a complete dedicated package allows the recording of force vs time data point High speed data acquisition device with up to 2 Mhz to record the force/displacement curve during the test. Acquisition system built in the electrical panel with USB connection to the computer Win Impact Windows based software Unlimited number of tests saved Multiple batch management Report customisation Statistical analysis Data transmission via RS232 Force-time and Force-stroke Graphic analysis Results analysis according to ISO14556 - ASTM E 2298 USB Data Transmission Accessories and Appications Temperature conditioning, Centreing device, Plinth, Safety and easy access, Broken specimen conveyer, Gear system, Broaching Press Basic Console Included in standard configuration Up to 4 energy levels Set: ISO/ASTM – IZOD/CHARPY Up to 100 tests saved Test report direct printing on USB printer
